Django is an excellent web framework that allows for excellent integration of geospatial data with other database functionality. The built-in development server is excellent during the development phase and is exceptionally easy to configure, but cannot handle concurrent connections and therefore cannot be used in a production environment.
Apache is one of the most commonly used HTTP servers and is available for almost any web server platform you could imagine. However, to get it running properly with a Django application requires a bit of configuration.
Environment
- Ubuntu Server 18.04 (In this case, installed on an Amazon Lightsail instance but this is not important)
- Python 3.6
- Django 2.2.6.0
- Apache 2.4
Copying Django Project to AWS
You can skip this section if you are using a different web host.
Configure FTP access with Filezilla
The best way to upload files to your AWS server is to use an FTP client. There are numerous different FTP clients but you will have to use an SSH key pair to configure them properly.
To download the private SSH key (*.pem) file you will need to go to your AWS Lightsail account page and create a new SSH key or download the default one.
Once you have downloaded your SSH key to a safe location on your computer open Filezlla and go the the “Site Manager” and create a new site.
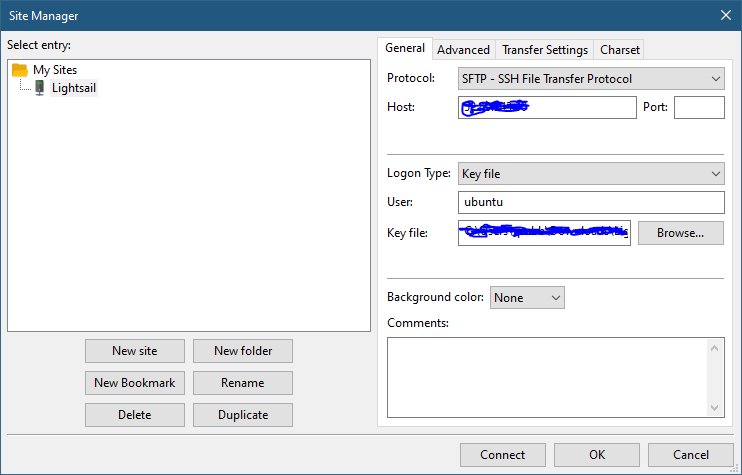
You will need to set the protocol to SFTP and the host is your AWS public IP.
Change the logon type to “Key File”. AWS uses a default username of ubuntu for Lightsail instances running Ubuntu server.
Select the keyfile and click “Connect”.
Uploading to your Ubuntu Server
Once you have connected you will see the root folder structure of your Ubuntu installation in the Filezilla application.
Since the owner of all the folders in this root directory are limited to the root user, you will have to allow remote connections (temporarily) to upload data to a folder. This tutorial will use the \data\ folder for our Django application.
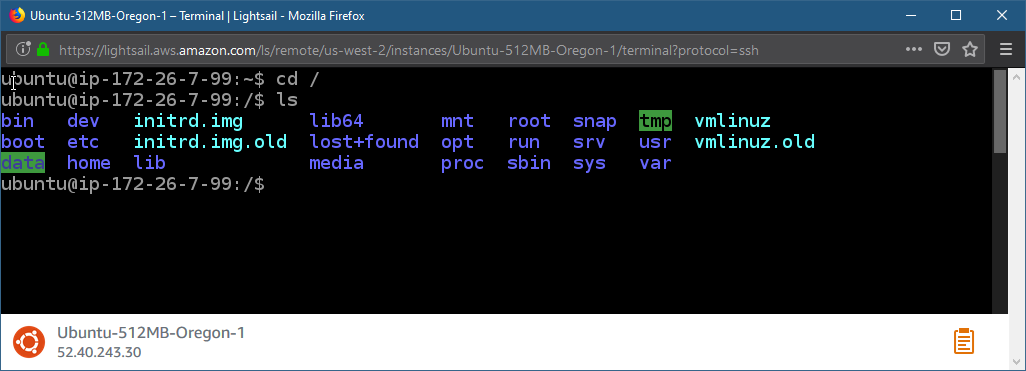
Launch the terminal for your Lightsail installation either using an SSH client or by using the built-in terminal in the AWS dashboard.
Change directories to the root by typing:
cd /
Then use the ls command to see the root folder structure.
To change the permissions on a folder use:
chmod 777 /yourfolder
This will allow you to upload to that folder in Filezilla
Once this is done, just copy and paste your entire Django project folder into the desired place on your server in Filezilla.
Preparing your system
Ensure you have Python 3.6 (or your preferred version of Python 3) installed on your server with the appropriate pip package. To install Python 3.6 type:
sudo apt install python3
You will also need to install pip, apache2 and in the case of Django mod_wgsi. You can do so in one fell swoop by using the command:
sudo apt install python3-pip apache2 libapache2-mod-wsgi-py3
Configuring a virtual environment
It is good practice to use virtual environments with Python projects to prevent conflicts between packages and to keep the base interpreter from getting corrupted.
First you must install the virtualenv package for Python3 by typing:
sudo pip3 install virtualenv
Navigate to the folder where you have saved your Django files and create a virtual environment folder inside this folder by typing:
virtualenv yourprojectenv

Where you can replace “yourprojectenv” with whatever name you wish, in this case the name “myprojectenv” was used.
Activate this environment using:
source yourprojectenv/bin/activate

The name of the virtual environment will show up before the user string on the terminal line in parentheses (myprojectenv) to indicate you have activated the environment.
Installing required packages inside your virtual environment
When you create a virtual environment you are creating a blank Python environment inside that folder. This does not inherit any packages or modules installed in the primary Python interpreter with the exception of PIP.
At the very minimum a Django project requires the Django module to be installed. However, as projects get more complex it is necessary to keep track of all the different dependencies your project requires so you can install them in your virtualenv.
With the virtual environment active use PIP to install any dependencies your project requires.
Keep in mind that within the virtual environment you must use the python and pip commands and not the python3 and pip3 commands even if you are running a Python 3.x installation.
Leave the virtualenv running.
Preparing your project
Migrations
Assuming you are still in the virtual environment and you are in the project root you will need to run makemigrations and migrate on your Django project
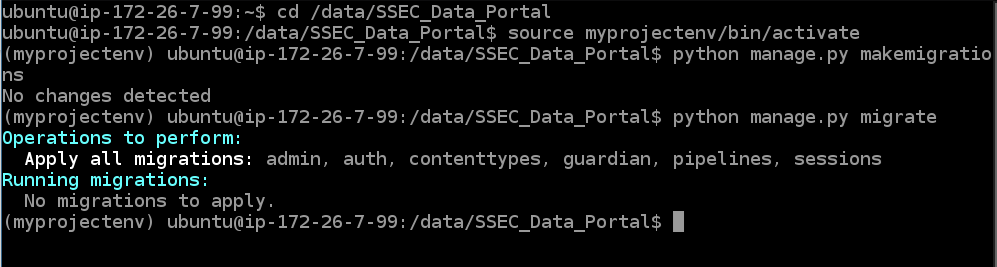
If this is the first time you run this you will see that new migrations are in fact made and applied unlike the example above where I ran this previously.
Static Files
You will also need to collect the static files by running manage.py collectstatic.
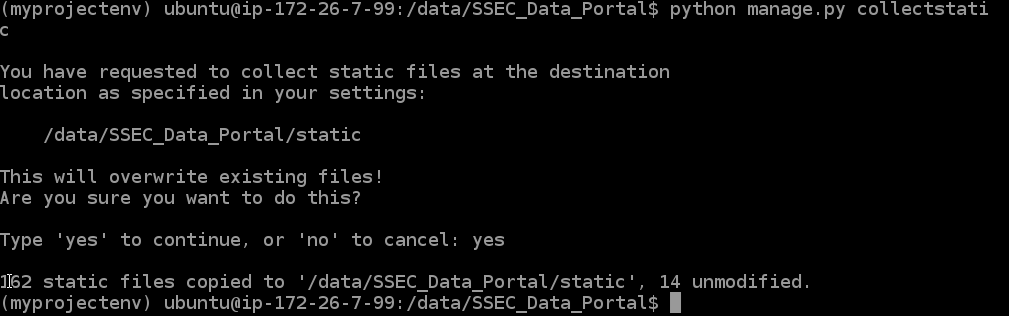
This moves your static files into the appropriate static folder on the server.
Testing your application with the built-in development server.
Configuring AWS to allow external connections to port 8000
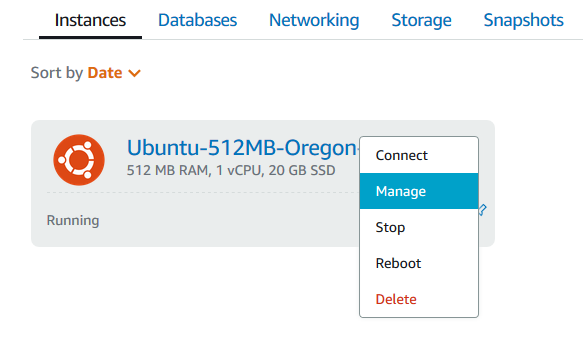
In order for the development server to be accessed externally port 8000 must be opened for your AWS instance. To do this, click on the three dots beside your Lightsail instance and select “Manage”.
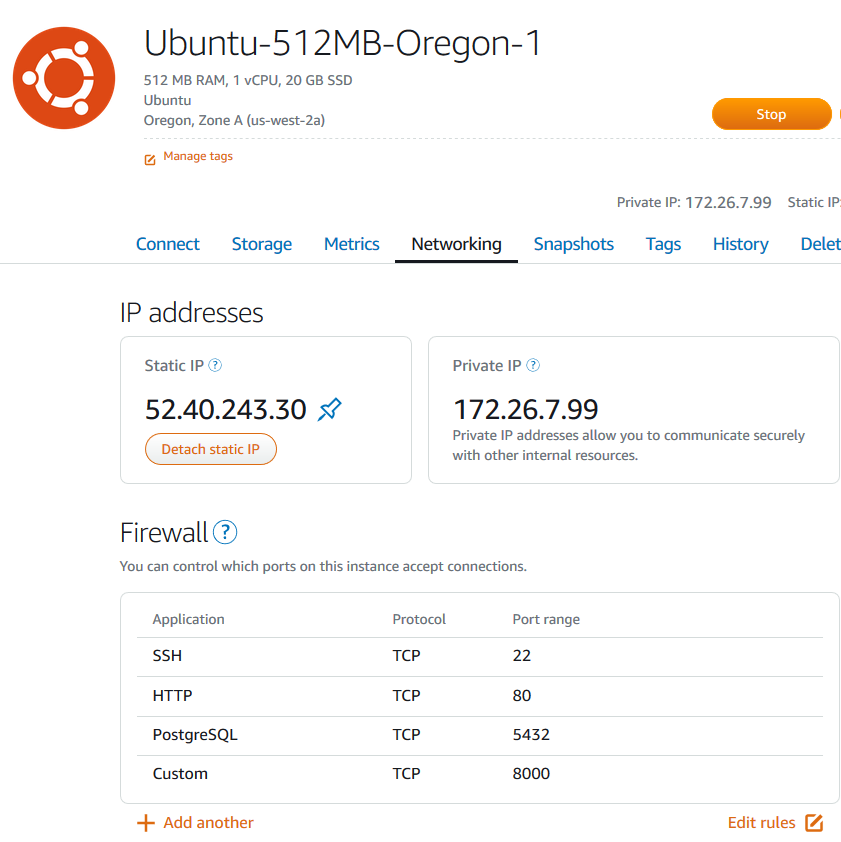
Then select the “Networking” tab and add a new firewall passthrough for TCP port 8000.
Changing the settings to allow for your server to run on a different IP or domain name.
In order for Django to connect it must be allowed to operate from your AWS public ip address or the domain name you have pointing to it. To do this use the Nano text editor to make the following changes to your settings.py file.
sudo nano settings.py
Under the ALLOWED_HOSTS add whatever addresses you need to the list.

Use Ctrl+X to close the settings file and save when it asks using the same file name.
Running the dev server
Finally we can test that the application works by using the runserver command and telling it to run on 0.0.0.0:8000 to indicate that this will be accessible externally.
python manage.py runserver 0.0.0.0:8000
Once the server is running you should be able to access the site by typing in the server IP address with port 8000 behind it.
Eg. gasportal.silverspringenergy.com:8000
If it is running, great! Shut down the dev server by using ctrl+C and then deactivate the virtualenv by simply typing
deactivate
Configuring Apache
We must first configure the virtual host file to pass the client connections to the Django project in the appropriate format. This is where the mod_wsgi module comes into play and is honestly the most confusing part of this process.
If you have installed Apache using the method outlined at the beginning of this tutorial you can simply type
sudo nano /etc/apache2/sites-available/000-default.conf

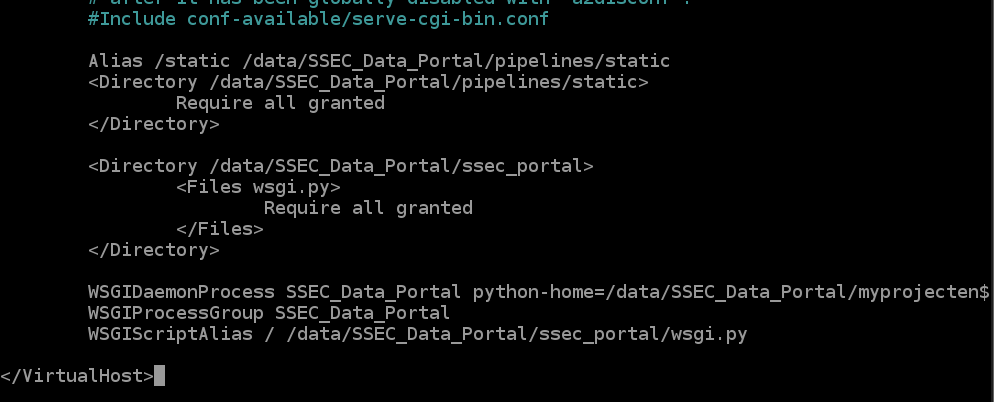
Between the <Virtualhost> and </Virtualhost> tags you need to add the following to your conf file:
Alias /static /djangoprojectrootfolder/pathtostaticfolder
<Directory /djangoprojectrootfolder/pathtostaticfolder>
Require all granted
</Directory>
<Directory /djangoprojectrootfolder/folderwherewsgiexists>
<Files wsgi.py>
Require all granted
</Files>
</Directory>
WSGIDaemonProcess arbitrary_name_of_project python-home=/pathtoprojectvirtualenv/ python-path=/djangoprojectrootfolder
WSGIProcessGroup arbitrary_name_of_project
WSGIScriptAlias / /djangoprojectrootfolder/folderwherewsgiexists/wsgi.py
Where:
djangoprojectrootfolder == the folder where your Django project root is
pathtostaticfolder == the folder where your static folder is
folderwherewsgiexists == the folder where wsgi.py exists
arbitrary_name_of_project == the name you want your project to have in this Apache configuration
Optional config for if you have used a non-standard folder as I have
Use Nano to edit the apache2.conf file
sudo nano /etc/apache2/apache2.conf
add the following to the bottom of the file just before all the commented lines:
<Directory /djangoprojectrootfolder>
Require all granted
</Directory>
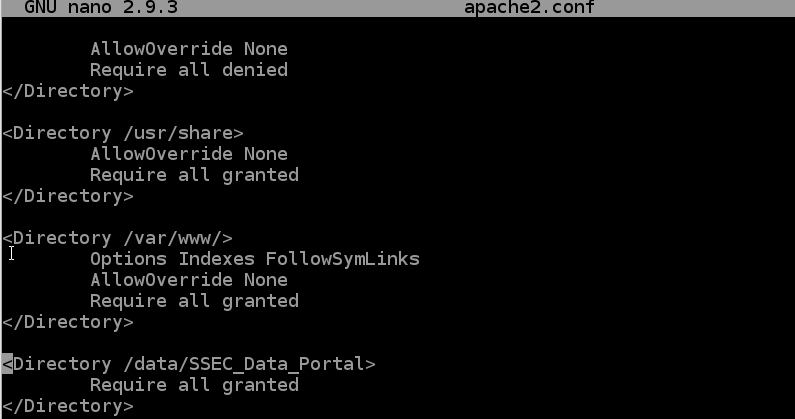
Not doing this will result in the default apache config page launching even after you have run your server.
Setting permissions and getting started
If using an sqlite based web application
Change the access permissions of the project db.sqlite3 file to 664
chmod 664 /djangoproject/db.sqlite3
and change its ownership to the Apache group (www-data)
sudo chown :www-data /djangoproject/db.sqlite3
Setting folder ownership
You will also need to grant www-data ownership of your project folder and any folder where you have user uploads or other files being created by Django.
sudo chown :www-data /djangoproject
sudo chown :www-data /uploadfolder
Restarting the Apache service
Finally we restart the Apache service and you should be able to see your site by going to its address!
sudo service apache2 restart
All done. Enjoy your site!