This will cover creating basic vector data in QGIS. Included here will be instructions on how to create shapefile layers, and GeoPackage layers, and creating new geometry tables within a PostGIS Database.
Creating Shapefile Layers
Creating Shapefile layers in QGIS is as follows:
-
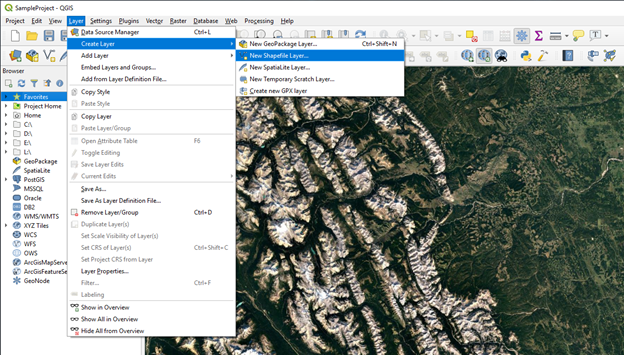
Open a QGIS project and save the project file in an appropriate location. Saving the project file is not necessary for the creation of a shapefile, however it simplifies the process if you wish to revisit the data. From the top navigation bar of QGIS, select ‘Layer > Create Layer, New Shapefile layer’.
-
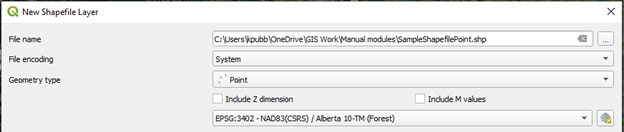
The ‘New Shapefile Layer’ dialogue window will open. From here, pick a file name for the shapefile to be created, and select an appropriate directory on your PC. Leave File encoding as ‘System’ and select the appropriate geometry type for your application. In this case, point geometry was selected. A coordinate system (CRS) must be chosen here as well. This will vary depending on your region; however, a projected system is generally recommended.
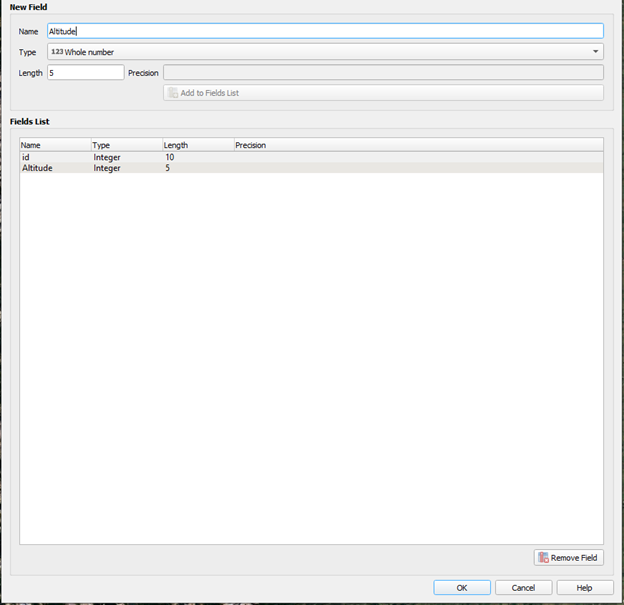
- Once the geometry type and CRS are selected, fields must be defined for attribute data within the shapefile. In this case, we will create a field called ‘Altitude’ and assign the ‘whole number’ data type to the field, as it will be used to store integer data only. The field length limit will be set to 5, ensuring no number larger than 5 digits can be entered into this field. ‘Precision’ only applies to decimal number fields and would define the number of decimal places allowed for the numerical values. See below for the field creation menu and fields list within the ‘New Shapefile Layer’ window.
-
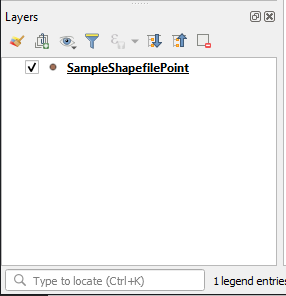
Once all of the necessary fields have been added, select ok to create the file in the location specified earlier. From here, data can be then edited and imported into the file. Since this is a new file, no data will be displayed, however a layer should be added to QGIS layer panel.
Creating a GeoPackage Layer
Creating a GeoPackage layer differs from a Shapefile in that a GeoPackage is a self-contained SQLite based database container file which can store multiple feature layers. Below is a process to create a basic GeoPackage container with two feature layers.
-
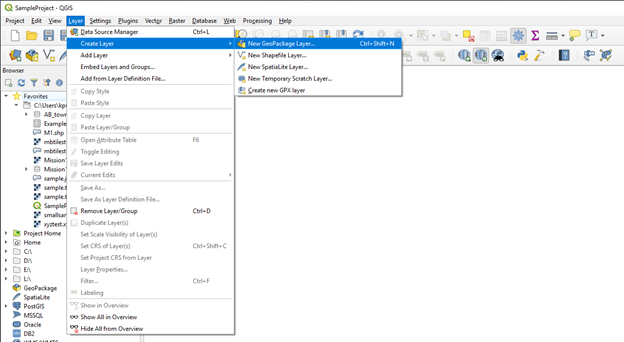
Go to ‘Layer > Create Layer > New GeoPackage Layer’ from the navigation bar. This will open the ‘New GeoPackage Layer’ window.
-
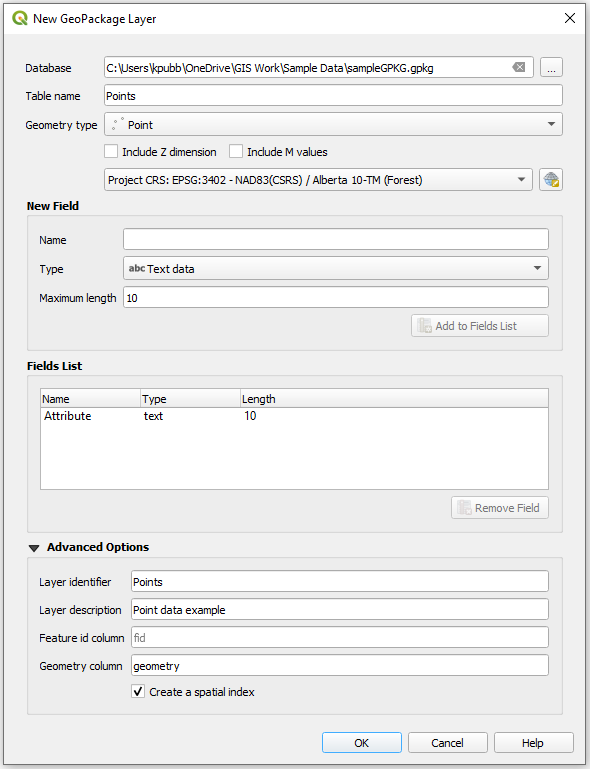
In the ‘New Geopackage Layer’ window, first the database name and location of the GeoPackage layer must be selected. First, select the browse button next to the database field and select an appropriate name and file directory.

- Once the name and location of the container has been established, we can create the first of the two geometry layers to be stored within the GeoPackage. In ‘Table Name’ type the name of the feature layer and select the geometry type from the dropdown menu below. Once again, select an appropriate CRS for the feature layer. Similar to shapefiles above, fields can be created within the new layer for attribute data. For demonstration, a text data field with a max length of 10 was created for the Points feature layer (see below).
-
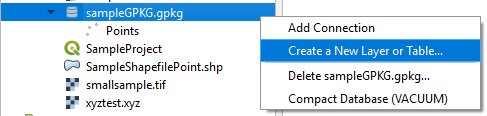
Selecting Ok will then create the GeoPackage with a single point feature layer within. Now we must create a second feature layer. Find the newly created GeoPackage and right click to bring up a contextual menu. From here, select ‘Create a new layer or table’.
-
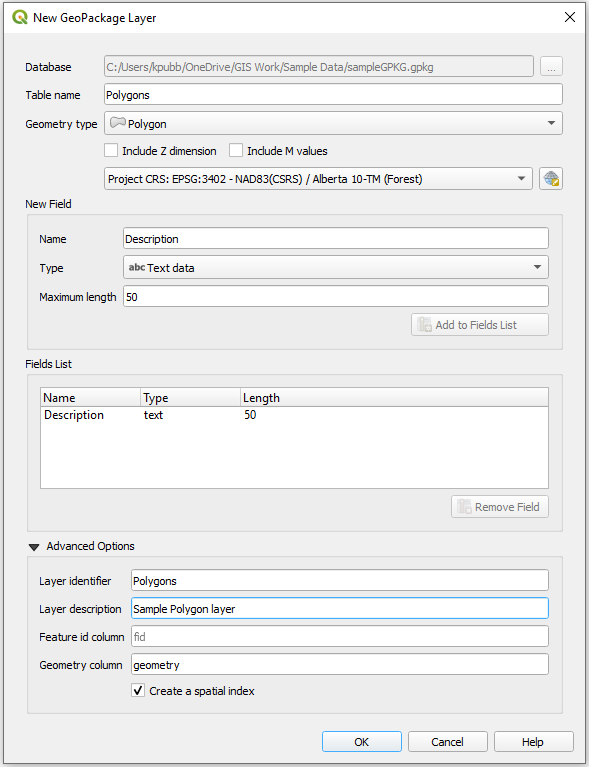
The ‘New GeoPackage Layer’ window will open again, however a new table name, geometry type, and CRS can be selected for the new layer. In this case, a polygon layer name ‘Polygon’ was created using the same CRS as the ‘Point’ layer created before. In addition, a text data field called ‘Description’ was added as an attribute field with a max length of 50.
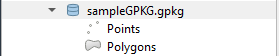
- Selecting Ok will create the polygon layer within the same GeoPackage as before. See below for the GeoPackage containing the ‘Points’ and ‘Polygons’ layers. These can be edited separately. In addition, data from other file types, such as shapefiles can be imported to create new layers as well.
Creating Data in a PostGIS Database
Creating new geometry tables in a PostGIS database varies depending on the implementation of the PostGIS Server from which the database is run. This will cover two primary methods of adding new geometrically enabled tables to a pre-existing PostGIS Database. These are importing from existing data (shapefiles, etc.) and manual creation through Ubuntu Linux 18.10 terminal.
Importing from Existing Data Sources
The procedure for importing data to a PostGIS database through QGIS is outlined below:
-
Ensure the PostGIS database connection has been established, and that the user has full access to the schemas and tables within.
-
Locate the vector data file that will be imported to the database. This can be most common file types such as shapefile, GeoJSON, GeoPackage, ESRI Feature Class, and KML. Add the file to the a QGIS Project as a layer.
- To import the file to the PostGIS database, simply drag the layer from the Layer Panel to the schema you wish to import the data to. The file will import and be saved to a new database table.
Creating New Tables within a PostGIS Schema
To create new data directly within the PostGIS database, terminal access to the PostGIS database is required. Here a new schema and table will be created to store geographic data.
-
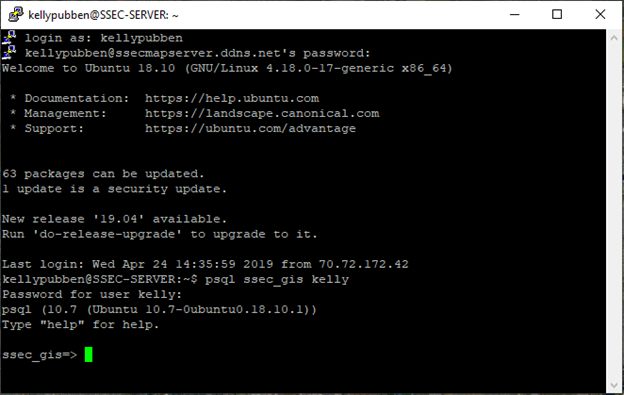
First, establish a connection to the PostGIS Server. In this case, the server is running on Ubuntu Linux, and is located remotely. Logging into the server will vary depending on the application, so the first step covered here will be accessing PostgreSQL once the user has logged into the server. To access PostgreSQL, enter ‘ psql [database name] [username]’ , using the name of the PostGIS database and your user access password in place of these. If successful, the terminal will prompt for a password. See below for an example.
-
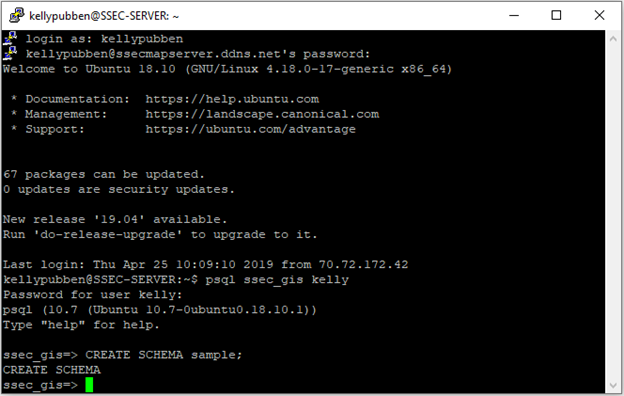
Now that the database has been accessed, commands can be entered. To start, a new schema called ‘sample’ will be created in the database. To do this, simply enter the command ‘CREATE SCHEMA sample;’ into the terminal. If successful, the terminal will return the name of the schema. This can be confirmed by refreshing the database from QGIS.
-
Now a new table to store data within the schema must be created. The basic command is ‘CREATE TABLE sample.demo( ‘ which will create the table within the ‘sample’ schema. Following that, parameters for fields within the table should be defined. See below for the full series of commands. In this case, 3 fields are created. ‘ID’ is set as the primary key, ‘name’ is defined as a string field with a 20-character limit and no null values allowed, and ‘value’ is defined as a real number field.

- The creation of the table and schema can be confirmed from the browser panel in QGIS. Data can now be added to the table through editing or capture.