This post will focus on the basic installation and implementation of QGIS Desktop software on both Windows and Linux based systems.
Installing QGIS: Windows
Follow the steps below to install QGIS on Windows systems. This includes Windows 7, 8, 8.1, and 10.
- Navigate to https://qgis.org/en/site/forusers/download.html in your browser to find the downloads page for various versions of QGIS. Download the long-term release option (Version 3.4 at the time of writing) for Windows and make note of the download location. Note that the long-term release is recommended for stability. Select either 32 bit or 64 bit depending your version of Windows.
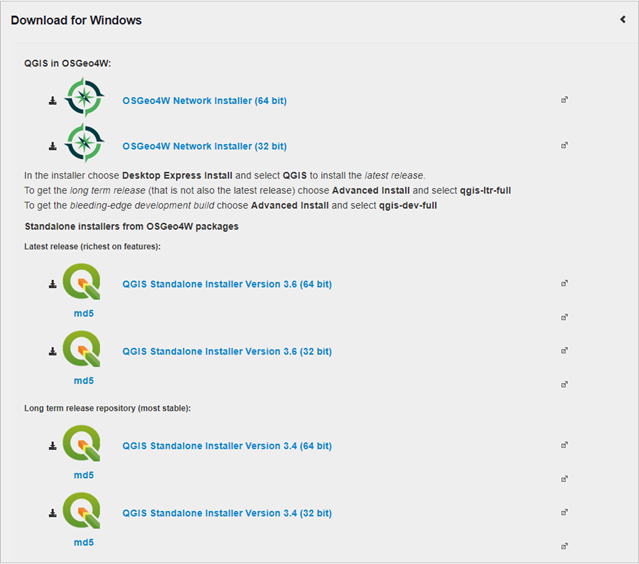
Figure 1: QGIS for Windows Download Options
-
Following download, run the executable from the download location (varies by user). You must accept the license agreement before continuing.
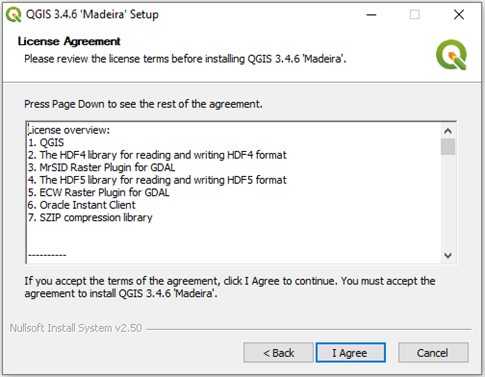
Figure 2: QGIS License Agreement. Select ‘I Agree’.
-
Choose an appropriate install location on your PC.
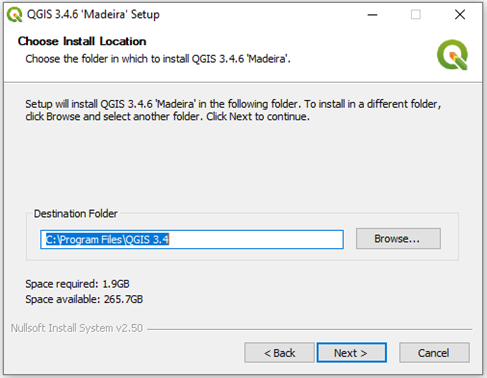
Figure 3: Selecting an install location
-
Choose the components to install. For most applications, the sample datasets are not required so simply leave QGIS selected, then click install to begin the process.
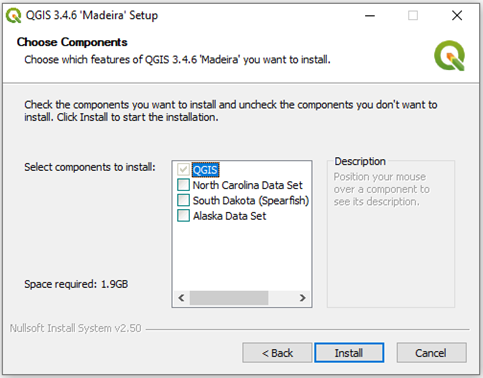
Figure 4: Selecting QGIS components for installation. Select ‘Install’ here to start the installation process
-
Once installation is complete, ensure the ‘Reboot now’ option is selected, and choose ‘Finish’ to reboot the system and finish the installation of QGIS.
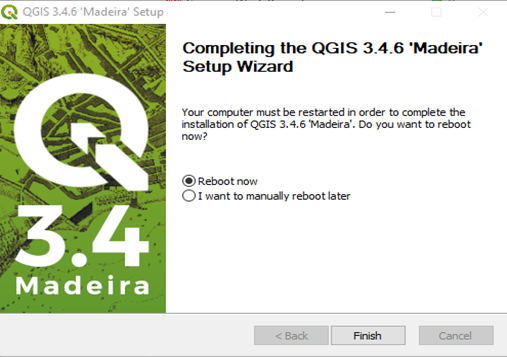
Figure 5: Select ‘Reboot now’ to finish installation and reboot the computer.
Installing QGIS: Linux
For Linux based systems, follow the steps below to install QGIS. This is for desktop applications only and is based on Ubuntu Linux 18.10. Other Linux distributions may require different steps to be taken.
-
In a browser, navigate to https://qgis.org/en/site/forusers/download.html and select the ‘Download for Linux ‘ tab. Select your Linux distro (In this case, Debian/Ubuntu was selected).
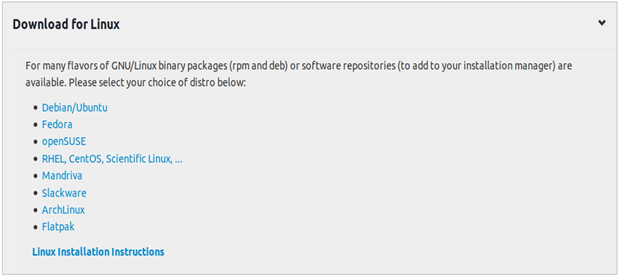
Figure 6: Selecting a Linux distro from the QGIS download page.
- Under the Debian/Ubuntu header on the web page, scroll down to the release versions table. As we are going to install the long-term release version of QGIS for Ubuntu 18.10, we will add those lines to the repository in the Linux terminal. First, open the terminal and enter ‘sudo
nano /etc/apt/sources.list‘. It will ask for your user password, following which it will open the ‘sources.list’ file.
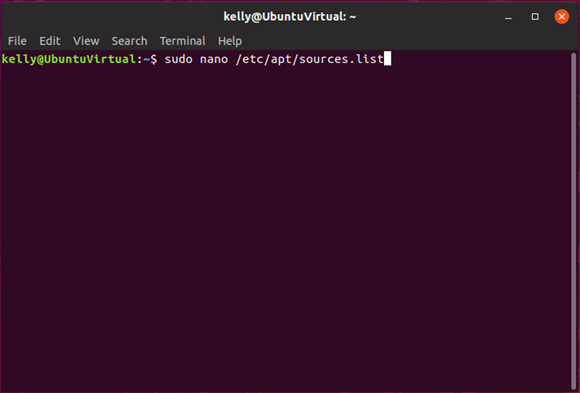
Figure 7: Ubuntu terminal repository list command, outlined in red.
- At the bottom of the resulting list of repositories, add the lines for the long-term release of QGIS, ‘deb https://qgis.org/ubuntu-ltr cosmic main‘ and ‘deb-src https://qgis.org/ubuntu-ltr cosmic main‘. This will add the repository for the long-term release of QGIS for Ubuntu. Press CTRL-O, then ENTER to write these new lines to the file. You may close this terminal session.
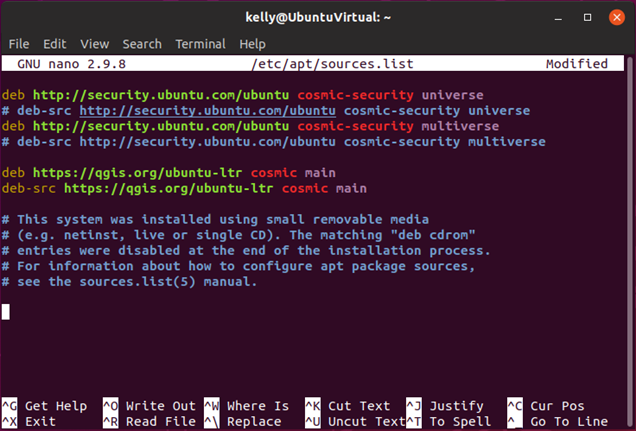
Figure 8: Adding the QGIS repository. See red box for added lines.
-
Open a new terminal window and enter the command ‘sudo apt-get update’. Let the process complete.
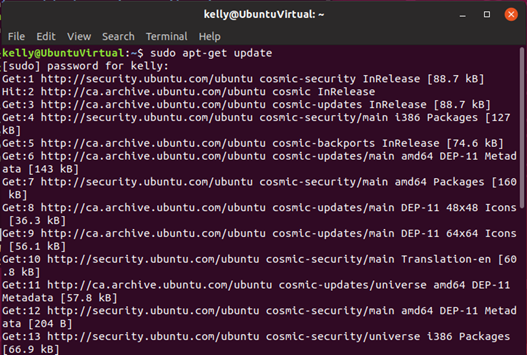
Figure 9: Updating the repository for QGIS
If the above process gives a keyserver or security error, enter ‘sudo apt-key adv –keyserver keyserver.ubuntu.com –recv-key CAEB3DC3BDF7FB45′ into the terminal (see below), then attempt the above process again. This process will retrieve a key from the Ubuntu servers for validation
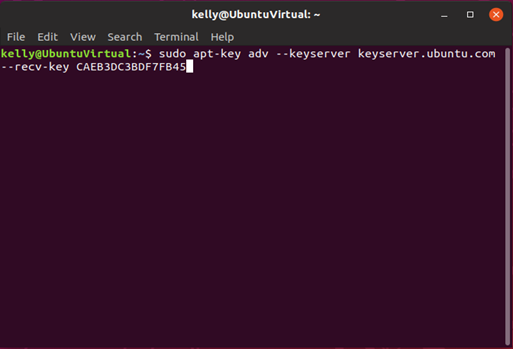
Figure 10: Downloading and adding a key from a keyserver
-
Enter the installation command ‘sudo apt-get install qgis python3-qgis qgis-plugin-grass‘ in the terminal once the above process completes. This will install QGIS onto the system, as well as Python 3 and GRASS plugin.
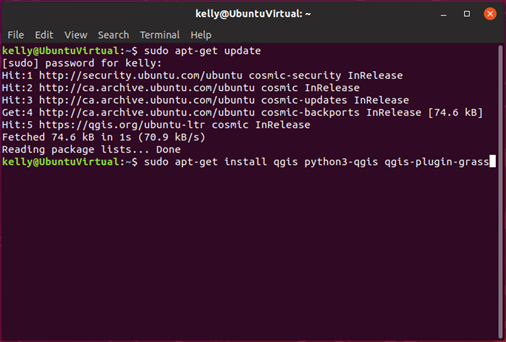
Figure 11: Installing QGIS in terminal, see red outline for command.
- Exit the terminal when the process completes, then click on the Applications icon and check to ensure QGIS has been installed. It should appear as below. If so, QGIS is now ready to use.
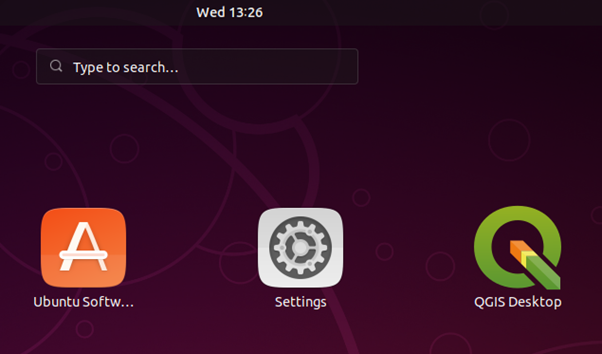
Figure 12: QGIS Desktop Completed Installation