Importing Static Data to QGIS
This section will focus on basic importing of static geospatial data to QGIS project files for use. This will not cover the use of PostGIS or PostgreSQL for data management. Common standard files types will be included.
Adding Favorite Directories
QGIS allows the user to add ‘favorite’ directories to the browser. This is useful for repeatedly accessing the same file location for a project.
Vector File Types
Shapefiles (.shp)
Importing shapefiles to QGIS is natively supported and straightforward. Below is an example of the process to import a shapefile to QGIS.
-
Navigate to the directory where the shapefile is stored with the browser panel in QGIS. By default, this will be pinned to the left side of the window.
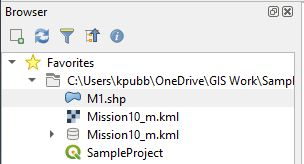
Figure 1: Example QGIS File Browser Window, with file to be imported outlined in red.
-
Double click the shapefile or drag it to the layer pane to add it to the project as a layer. The name of the shapefile will appear in the layer panel when it has imported (see below). Alternatively, select Layer > Add Layer > Add Vector Layer and select the file location in the ‘Source’ section of the resultant window.
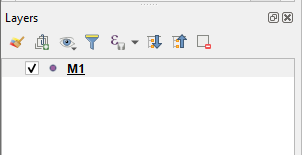
Figure 2: Shapefile layer added to QGIS from the shapefile in step 1
- To save the imported layer to a QGIS project file, navigate to ‘Project’ at the top of the window and save the project file with an appropriate name and location.
KML/KMZ Files (.kml, .kmz)
Similar to shapefiles, KML (Keyhole Markup Language) files and KMZ (Keyhole Markup language Zipped) files are natively supported in QGIS and do not require conversion. Below is an example of how to import a KML file to a QGIS project file.
- Navigate to the KML file location in the QGIS browser panel. Expand the parent KML directory and select the line file within.

Figure 3: KML file directory in QGIS browser pane
-
Double click or click and drag the KML data into the layer window to add it to the project. Alternatively, select Layer > Add Layer > Add Vector Layer and select the file location in the ‘Source’ section of the resultant window.
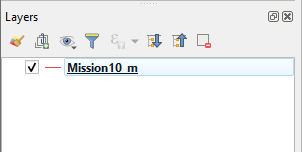
Figure 4: KML layer successfully added to the QGIS project
- To save the imported layer to a QGIS project file, navigate to ‘Project’ at the top of the window and save the project file with an appropriate name and location.
GeoJSON (.geojson, .json)
GeoJSON is another open standard geospatial data format natively supported is QGIS. As such, importing these files is much the same as previous examples. See below for the step by step example.
-
Navigate to the file of interest in the QGIS browser panel. Select the file for import.
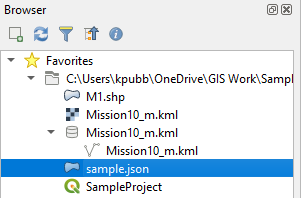
Figure 5: GeoJSON file in QGIS Browser window
-
Once selected, QGIS will prompt the user to select which layers within the GeoJSON should be added to QGIS. Select the desired layers, then OK to add them to the layer panel. If appropriate, check the option to add the layers as a group. Alternatively, select Layer > Add Layer > Add Vector Layer and select the file location in the ‘Source’ section of the resultant window.
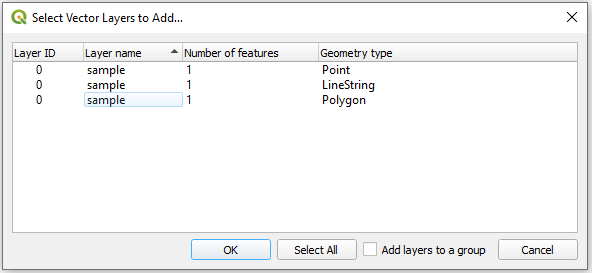
Figure 6: GeoJSON Layer selection
- Once the layers are added, they can be manipulated from the layer panel.
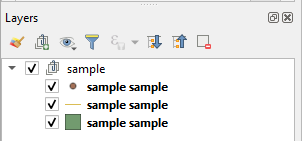
Figure 7: GeoJSON Layer Group
GeoPackage (.gpkg)
Another open source format for geospatial data, a GeoPackage is an SQLite database container file which can store multiple vector geometry types, similar to an ESRI File Geodatabase. It is a single self-contained file, but in the context of QGIS, it can store multiple layers and geometries. Below is the process for importing GeoPackage data to QGIS for use:
-
Navigate to the GeoPackage file location and expand the container in the QGIS browser panel. Note that it is not recommended to view these files in other file browsers.
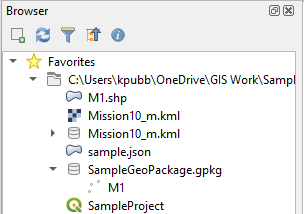
Figure 8: Sample GeoPackage file
- To add the GeoPackage to QGIS, one can either select individual datasets from within the GeoPackage, or the entire container. Doing so will add multiple layers to the Layer panel. Alternatively, select Layer > Add Layer > Add Vector Layer and select the file location in the ‘Source’ section of the resultant window. Note that only the individual dataset name will appear in the Layer pane.
ESRI File Geodatabase (.gdb)
QGIS 3.4 can open and manipulate the feature classes and rasters stored within an ESRI File Geodatabase directly, without conversion. Below is the process for importing File Geodatabase data to QGIS for use:
-
Navigate to the File Geodatabase location and expand the container within the QGIS browser panel. This will display the feature classes within.
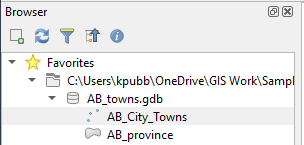
Figure 9: ESRI File Geodatabase Feature Classes
- Add the layers to the QGIS project manually (double click/ drag) or through the Layer settings menu (Layer > Add Layer > Add Vector Layer > Source).
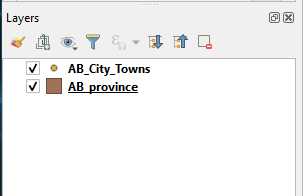
Figure 10: Imported Feature Classes in Layer pane
Comma Separated Values File (.csv)
Comma separated values files are a common file type for transferring geospatial point and attribute data into a GIS from a non-GIS source. Other text delimited files will follow a similar procedure, as will Excel workbooks. To import these into a QGIS project file, see below:
-
Go to Layer > Add Layer > Add Text Delimited Layer from the QGIS navigation bar.

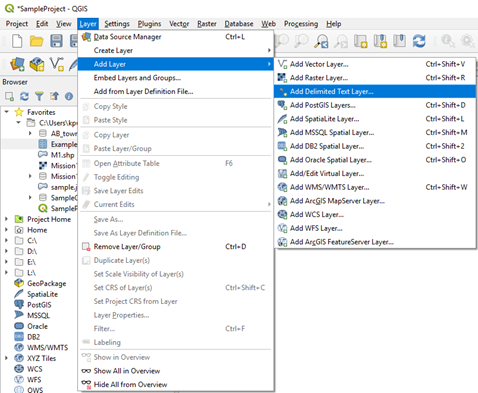
Figure 11: Adding a delimited text layer to QGIS
-
Under ‘File Name’ in the ‘Data Source Manager’ window, select the CSV file you wish to import by selecting the browse button and navigating to the file location.

Figure 12: Selecting the CSV file
-
Ensure that CSV is selected under ‘File Format’.
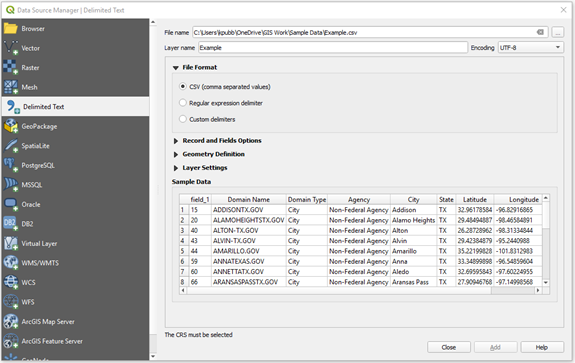
Figure 13: Ensure the ‘CSV (comma separated values)’ option is selected
- For ‘Records and Fields Options’, ensure that the ‘First record has field names’ box is checked if your file has headers on the columns. If this is checked, the ‘Number of header lines to discard’ option should be left at 0, otherwise it will disregard the first row of data. The ‘Detect field types’ option can be left checked if you want QGIS to automatically determine the type of data in each column, however it is recommended you verify the results.
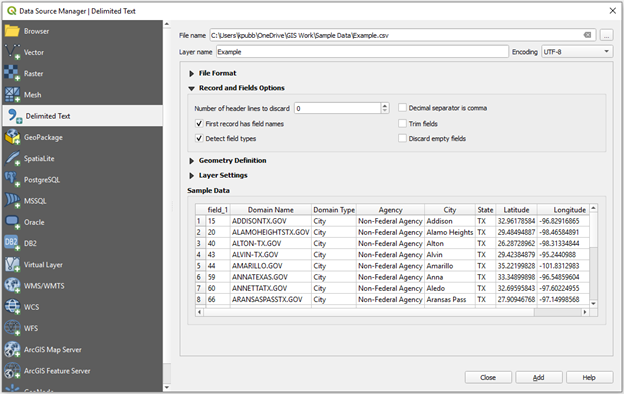
Figure 14: Records and Fields options
- The next step is to define which fields contain the geometry (coordinate) values for the dataset. QGIS will attempt to determine this automatically, but you must ensure that the correct fields are selected for the X and Y values. In this sample case, QGIS correctly selected the ‘Longitude’ field for the X values, and the ‘Latitude’ field for the Y values (see below). If the CSV contains point data, ensure that the ‘Point coordinates’ option is selected, and that the correct projection will be used to display the data.

Figure 15: Defining the Geometry type and fields for the CSV
- Once the above settings are ready, click ‘Add’ at the bottom of the ‘Data Source Manager’ window to add the data to the project as a point geometry layer. All attribute data will carry over through this process. The point data should display in the data window, and the layer should be added to the ‘Layer’ panel. If data does not display properly, ensure you are using the correct projection and that the correct fields have been selected for the X and Y data
Raster Data
Due to the variable nature of raster data, this section will only cover a basic import operation, using a GeoTIFF file. The procedure will be similar for other georeferenced imagery and raster files. Note that the raster will need to be georeferenced before import for proper display.
- From the QGIS navigation bar, go to Layer > Add Layer > Add Raster Layer to open the ‘Data Source Manager | Raster window’.
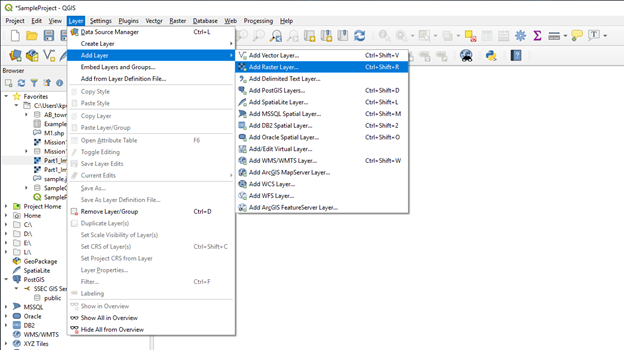
Figure 16: Accessing adding raster layers from the navigation bar
- Now simply click the browse button for the Raster Dataset under ‘Source’ and find the raster you wish to import. Following that, select ‘Add’ from the same window, and your raster will be imported as a layer in the QGIS project.

Figure 17: Selecting the raster file for import. Click ‘Add’ at the bottom of the window to create a layer for the raster
- The raster should now display in the data panel. Alternatively, you could simply drag or double click the raster file in the browser panel to add the layer to the project.