Translating geometries involves displacing vector data using a pre-defined offset distance from the current position of the data. In this case, we will be using this data to alter UAV flight paths (vector line data). This will involve shifting the paths to the East, West, North, or South, depending on the orientation of the flight path. In this case, we will be working within a PostGIS database schema, and directly altering the tables (feature layers) within. The process will be similar if working with local/static datasets.
In order to be able to alter entire flight paths, the Translate tool within QGIS 3.4 will be utilized. This tool will simply create a new feature layer with the entire flight path moved according to the tool parameters. Note that this tool also works with point and polygon geometries.
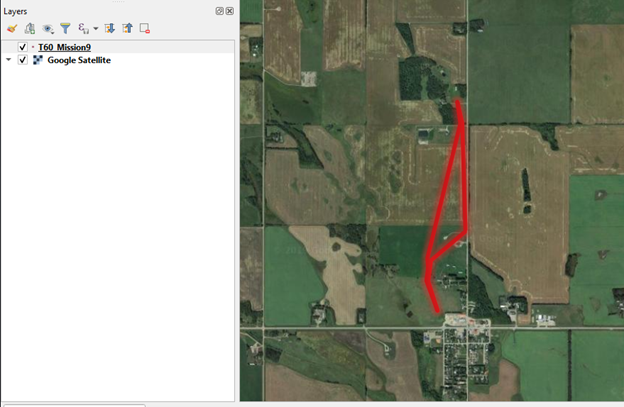
- First, select the line geometry feature layer (flight path) from the PostGIS Database, and add it to the QGIS canvas. Ensure the data displays properly, and that editing permissions are properly configured for the database schema. In this case, the vector line is displayed in red.
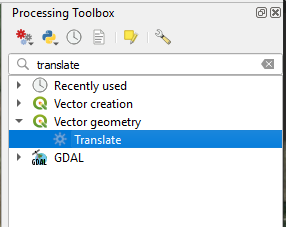
- Go to the top navigation bar and open up the processing toolbox within QGIS.

- Search for the ‘Translate’ tool using the search bar at the top of the Processing Toolbox window. Alternatively, it can be found under the ‘Vector Geometry’ tool category.
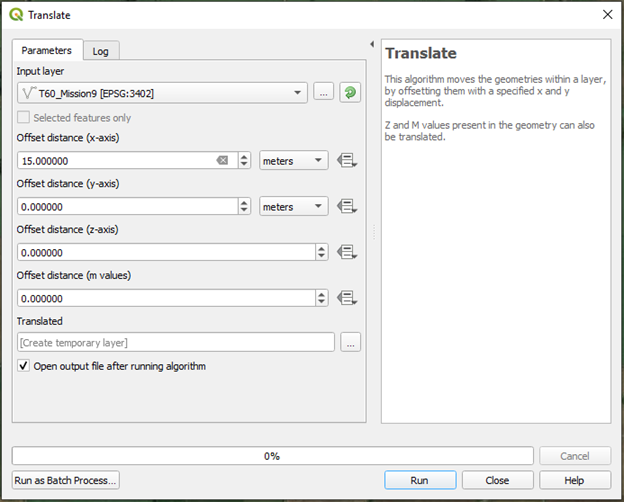
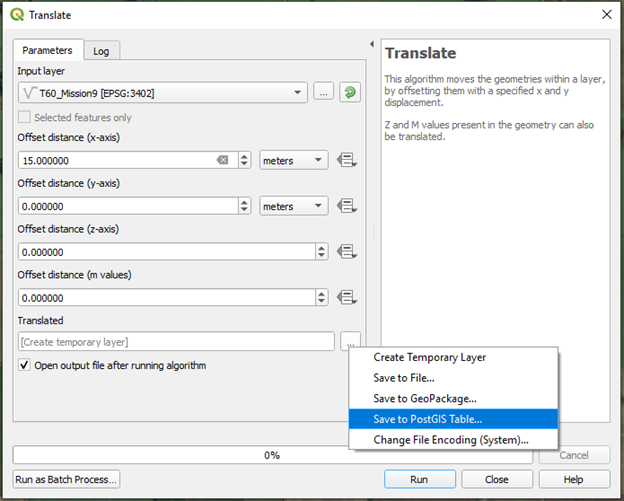
- Open the Translate tool and examine the parameters displayed. First, ensure the correct layer is selected in the ‘Input Layer’ box. Below there are numerical options for selecting offset distances in the x, y, and z axes. X we correspond to East(+) and West(-) movement of the geometry, and Y to North(+) and South(-). Note that the units by which the data will be offset is dependent on the CRS of the dataset, so ensure you are using the correct units. In this case, a projected CRS is being used, and the path will be moved 15 meters to the east, so enter ’15’ into the x-axis offset field.
- Since we are working within a PostGIS database schema, select the ‘Browse’ button next to the field under ‘Translated’, and select ‘Save to PostGIS Table’. From here, select the appropriate PostGIS database and schema in which to save the new data, and give it an appropriate name.
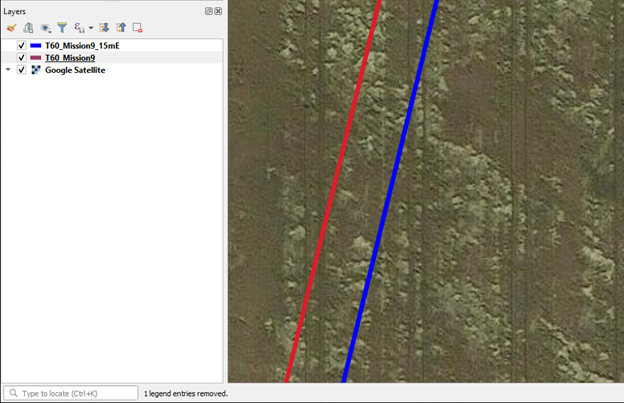
- Now simply select ‘Run’ at the bottom of the ‘Translate’ window, and the process will create a new table in the PostGIS schema and will display a new layer in the QGIS canvas upon completion. Ensure the data has been translated properly. In this case, the new vector line (blue) displays 15m to the east of the original (red) line. You will need to refresh the database for the new table to show up in the schema. Note the example below is highly magnified to display the effect of the translation.
